Using Calipers
Caliper is a tool used to transfer measurements from a part to a scale, or other instrument. The measurement is then taken by rule between the caliper joints. Calipers are very useful when dealing with hard to reach locations that normal measuring instruments cannot reach. They are an important measuring aid, and in the hands of a skilled worker, they can be a real time-saver. The three common types of calipers are the inside, the outside, and the hermaphrodite calipers. Calipers are available with different features. Calipers consist of two legs that are fixed firmly together at the top. Some calipers may have a fixed rivet or screw, so that they will maintain the position in which they have been set. Others have a spring loaded pivot point at the top and are adjusted by a screw to open or close to the required position.
Types of calipers
Outside calipers
Outside calipers are used for measuring outside dimensions, for example, the diameter of a piece of round stock.
Inside calipers
Inside calipers have outward curved legs for measuring inside diameters, such as diameters of holes, the distance between two surfaces, the width of slots, and other similar jobs.

Figure 1 Calipers: a. Firm joint calipers, b. Spring outside calipers, c. Plain inside calipers, d. Spring inside calipers
Hermaphrodite caliper
Also known as 'Odd-leg' or 'Jenny' calipers. Its one leg has a small stub to rest on a datum edge, the other has a simple flat end to one bent leg. The hermaphrodite caliper is a laying out tool used to lay out parallel lines with the edges of the workpiece. It can also be used to locate the center of cylindrical shaped workpieces. It should not be used for precision measurement.
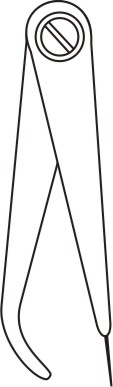
Figure 2: Hermaphrodite caliper
Using outside and inside calipers
Calipers may be difficult to use. The accurate transfer of measurement when using calipers depends upon the affectivity of the calipers against the work. 'Feel' is the light pressure of the calipers as they pass over the work. "Feel" skill is required for positioning hand measurement tools and interpreting the measurement result. Following steps/rules for using the calipers.
1. Do not force calipers, they will bend easily, and affect the accuracy of the measurements made.
2. Make fine adjustments by either tapping one leg on a hard surface to close the gap or by tapping the jointed end of the tool to open the legs slightly. Practice fine adjustment of calipers with one hand; this will leave you a free hand to steady the work.
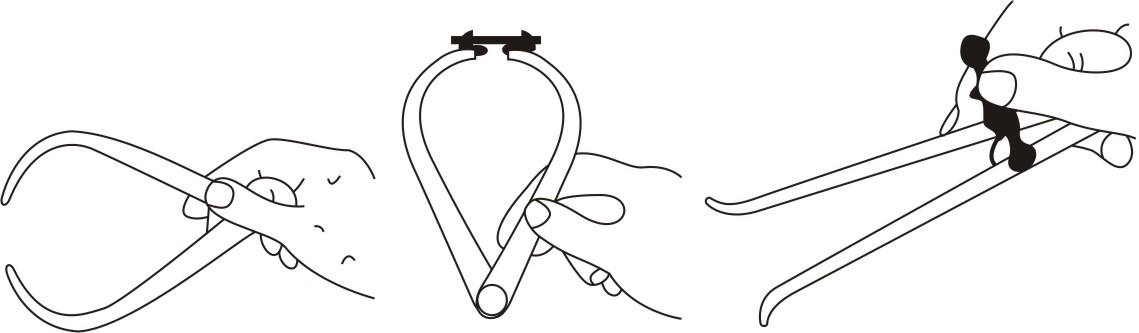
Figure 3: Adjustment of Calipers
3. For accuracy when setting any calipers to a rule, it is important to read off the measurement at eye level.
4. If measurements are made using calipers for comparison, one operator should make all of the measurements (this keeps the feel factor a minimal error source).
5. Obtain `feel' of caliper on diameter to be measured. The important thing to develop is a sensitive "feel" of the caliper and workpiece. Hold one toe of the caliper in contact with work and adjust the other leg until a slight drag can be felt on the other toe as you rock it back and forth. This feel can only be achieved by practice. The feel that is provided as the tool passes over center is the limit of its sensitivity.
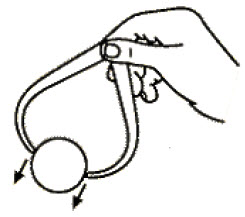
Figure 4: Obtaining the 'feel' and Setting to the work
6. Setting an outside caliper
i. Hold the steel rule so that it resets on the fingertips of one hand.
ii. Hold the outside caliper in the other hand. It should be possible to comfortably turn the adjusting screw with the thumb and the first and middle fingers.
iii. Hook one leg over the end of the rule and adjust the other leg to the required measurement as shown in the figure below.

Figure 5: Setting outside calipers to a rule
iv. Adjust the second leg until it splits the division of the required measurement on the steel rule.
v. Recheck the measurement by holding the one leg against the end of the rule. The end point of the second leg should be at the measured point.
7. To set inside calipers, rest both the toe of one leg and the end of the rule on a flat surface and adjust the other leg as before.

Figure 6: Setting inside calipers to a rule
8. For transferring caliper measurement, place the toes of the tools in contact, steadying them with a finger of one hand and adjust to match.
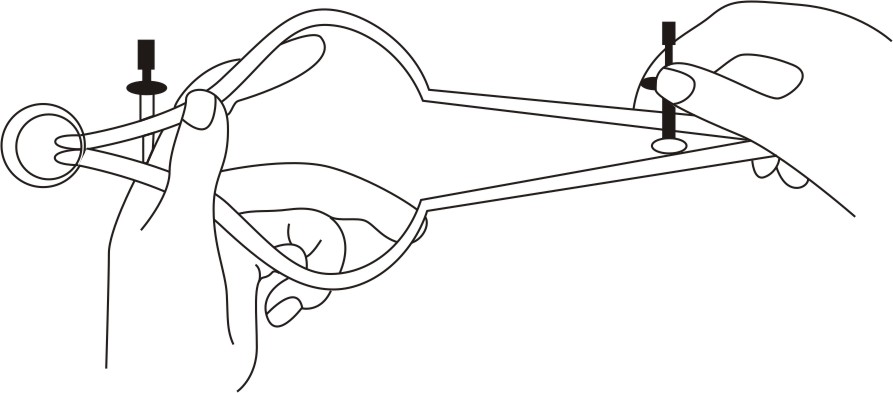
Figure 7: Transferring caliper measurement
1. For setting the Caliper, Place the caliper leg against a reference point or surface and adjust the divider point until it splits the measured point.
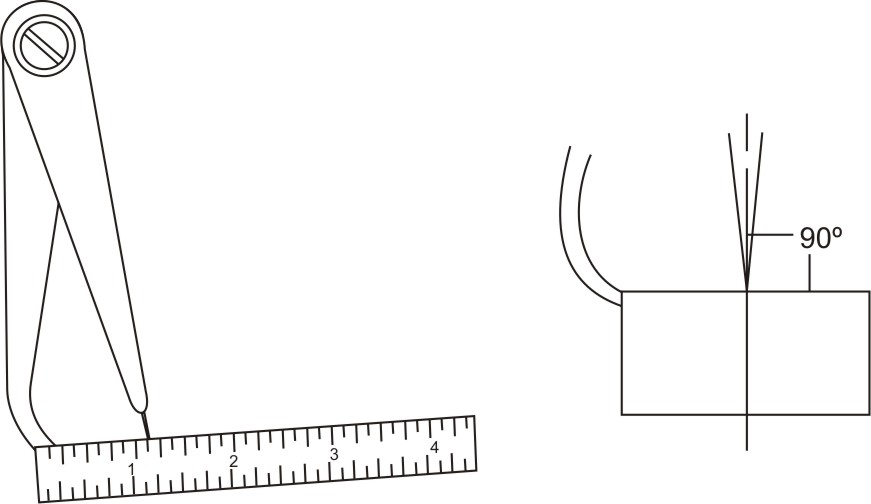
Figure 8 a, b: Setting the hermaphrodite caliper
2. For scribing parallel lines follow the steps given below.
i. Hold the caliper leg against the reference surface and bring the divider leg perpendicular to the reference surface and to the line of measurement.
ii. Now move the caliper and divider leg at the same time. Apply a slight force to the divider leg to scribe the parallel line.
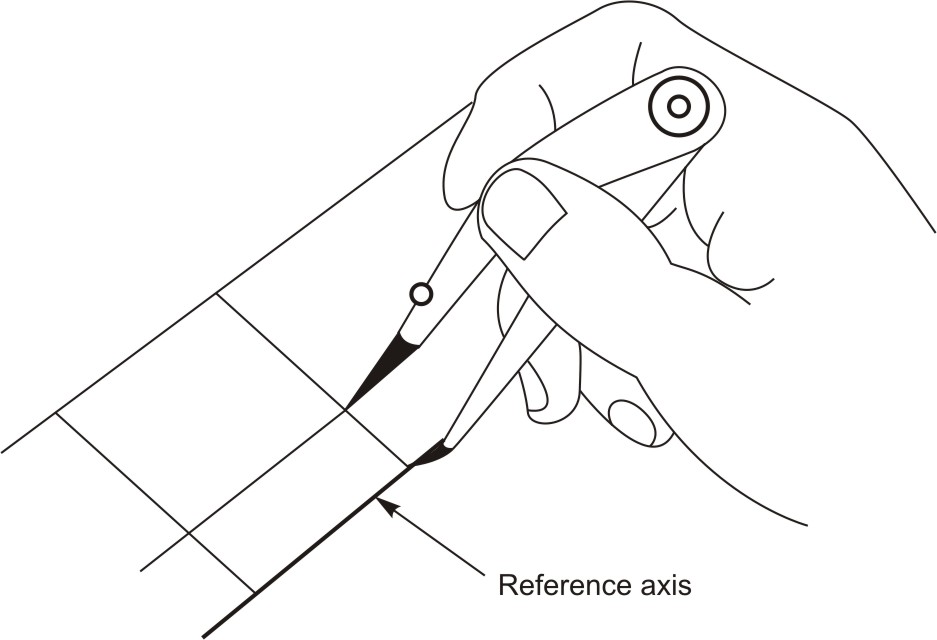
Figure 9: Scribing a parallel line using hermaphrodite caliper
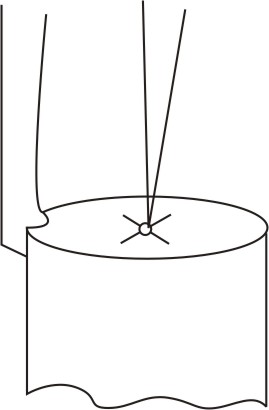
Figure 10: Centre finding using hermaphrodite caliper
These are used to mark out circles and arcs and to step off equal lengths along a line. These are used to mark out metal. These are heavier and have a lock. The legs of the divider must be of the same length and be kept sharp. Most dividers have a small handle on the top for griping the handle between thumb and index finger. The divider can be used to layout and measure distances.
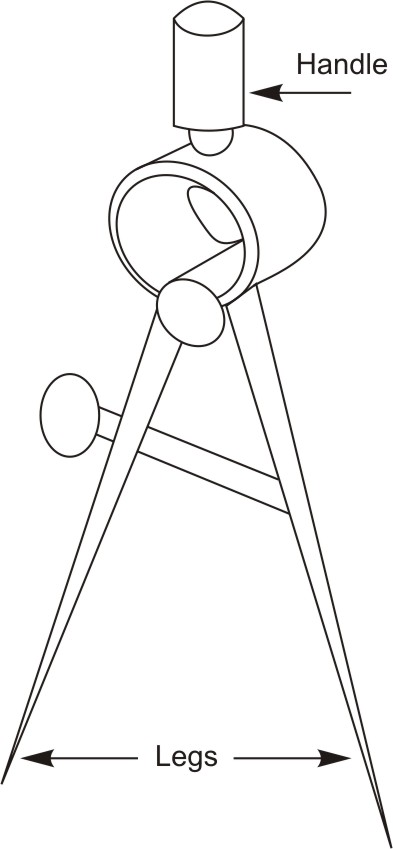
Figure 11: Divider
1. Set the divider leg at the required radius, for this place one point on an inch or mm mark of a steel rule and open the divider until the other leg matches the correct measurement required. Care should be taken to keep the leg lengths even. There should be no wobble to the legs and should be large enough that they do not have to be opened more than about fifty degrees to do the work.
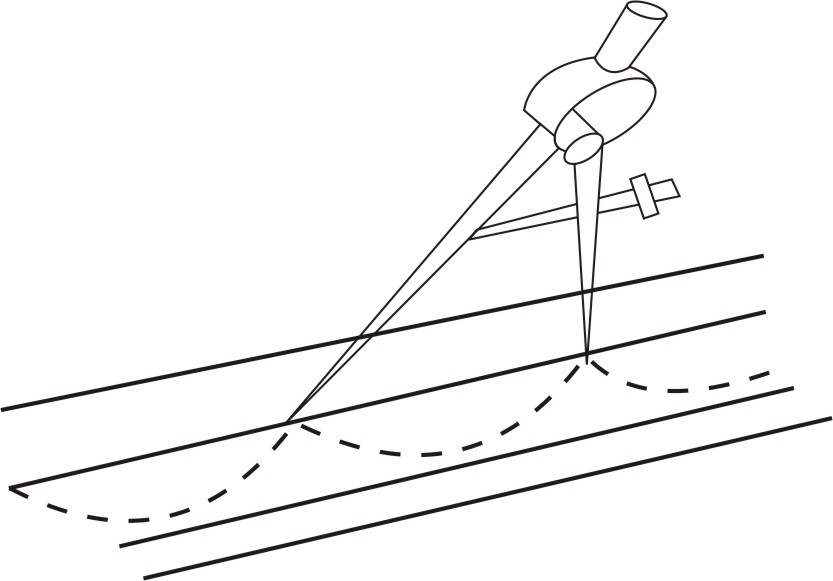
Figure 12: Laying out equal measurements
2. For scribing arcs or circles, calculate and mark the centres of any arcs in the profile. By applying some pressure to the point of one leg of the dividers, at the centre point of the circle, so that the point digs into the metal and anchors itself.
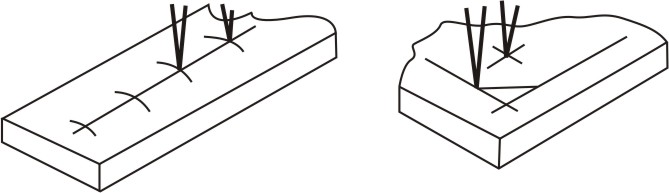
Figure 13: Using divider to Drawing Arc and circle
3. Set the dividers to the radius of the arc, grip the handle between thumb and index finger and place one point back in the centre mark.
4. After setting the dividers, hold the work down firmly and using the thumb and index finger gently scribe the arc or circle by exerting pressure on both legs.
5. Use as little wrist movement as is comfortable.
6. The tendency for the legs to slip is avoided by inclining the dividers in the direction in which they are being rotated.
7. The marks that you make should be good enough to be clear but not so hard that a fine sandpaper will not remove them.
Trammel
When scribing circles, arcs, and radii that are too large to be produced with the divider, a trammel should be used. The trammel is made of three main parts: the beam, two sliding heads with scriber points, and an adjusting screw that is attached to one of the heads. The trammel can be made to scribe larger distances with the use of extension rods. This layout tool is set in the same manner as the divider.
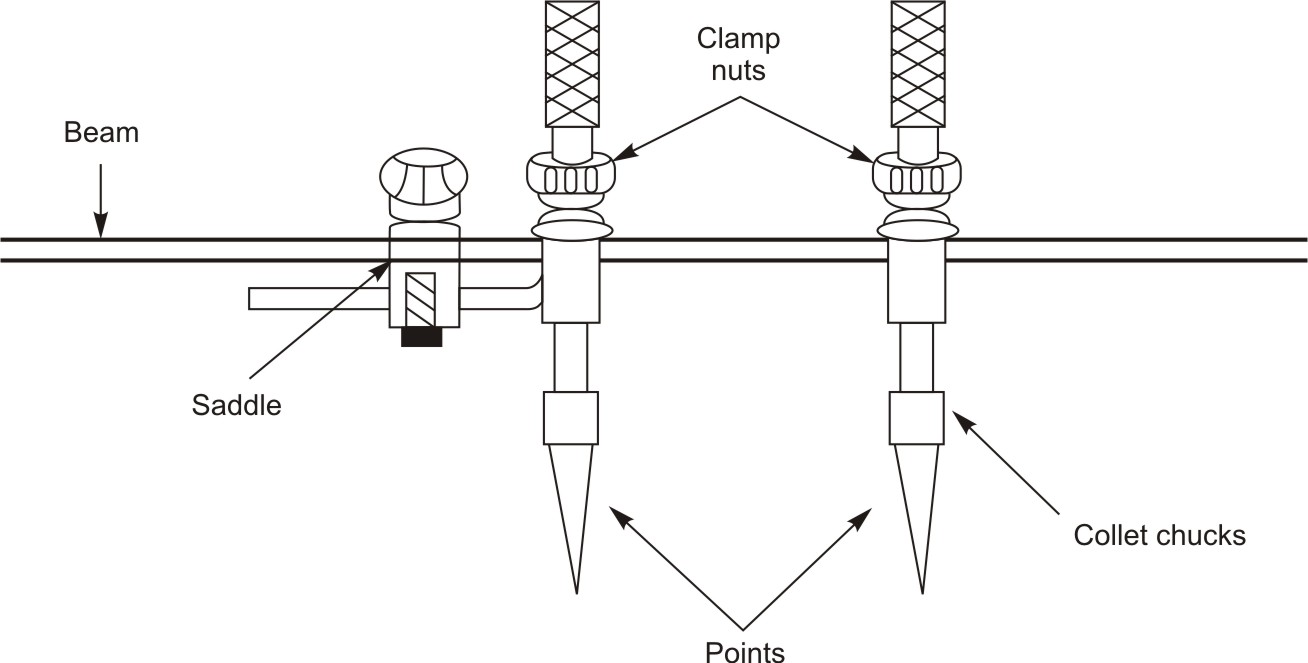
Figure 14: Trammel
| Tutorial 12 | Tutorial 14 |