Using Laying out work
Layout is a shop term, which means planning of the work on the surface of the material to be made into the finished part. It is the scribing of lines, circles, centers, and so forth, upon the surface of any material to serve as a guide to you in shaping and completing the job. This laying out procedure is similar to mechanical drawing but differs from it in one important respect. The lines on a mechanical drawing are used for reference purposes only and are not measured or transferred. The precision of the finished job depends largely on the care you take in making the layout. In layout work, main thing to remember is to measure twice, check twice, mark once, and cut once - cut metal can't be put back, even a slight error in scribing a line or center may result in a corresponding or greater error in the finished workpiece. Therefore, all scribed lines should be exactly located and all scriber, divider, and punches should be exact and sharp.
Steps to follow for laying out work
1. Plan before beginning any layout, it is one of the most important steps. Different jobs may require different layout tools and procedure depending on the type of job.
2. Follow the correct procedures for using the tools.
3. Study the drawing carefully before you start laying out work on the workpiece.
4. Check if enough material exists on all of surfaces of the workpiece to "clean up" or "machine out." Allow enough material to square the ends if required.
5. The work surface must be cleaned and made free from scratches, nicks, and burrs that would impact the accuracy of the reference surface and the layout work being done on it.
6. Coat the workpiece with a "wet chalk" or layout dye. As shiny surface, found on most metals, makes it difficult to see the layout lines. Layout dye , when applied to the metal surface, makes it easier for the layout lines to be seen. Layout dye is usually blue and offers an excellent contrast between the metal and the layout lines.
7. This makes the scribed lines highly visible, thus contributing to the accuracy of the work.
8. Locate and scribe a reference or base line. All the other measurements should be made from this. If the workpiece already has one true edge, it can be used in place of the reference line.
9. Using the base line as a reference line, locate and scribe all center lines for each circle, radius, or arc.
10. Mark the points where the center lines intersect using a sharp prick punch.
11. Scribe all circles, radii, and arcs using the divider or trammel.
12. Using the protractor, locate and scribe all straight and angular lines.
13. All layout lines should be clean, sharp, and fine.
14. All scriber, divider, and punches should be exact and sharp.
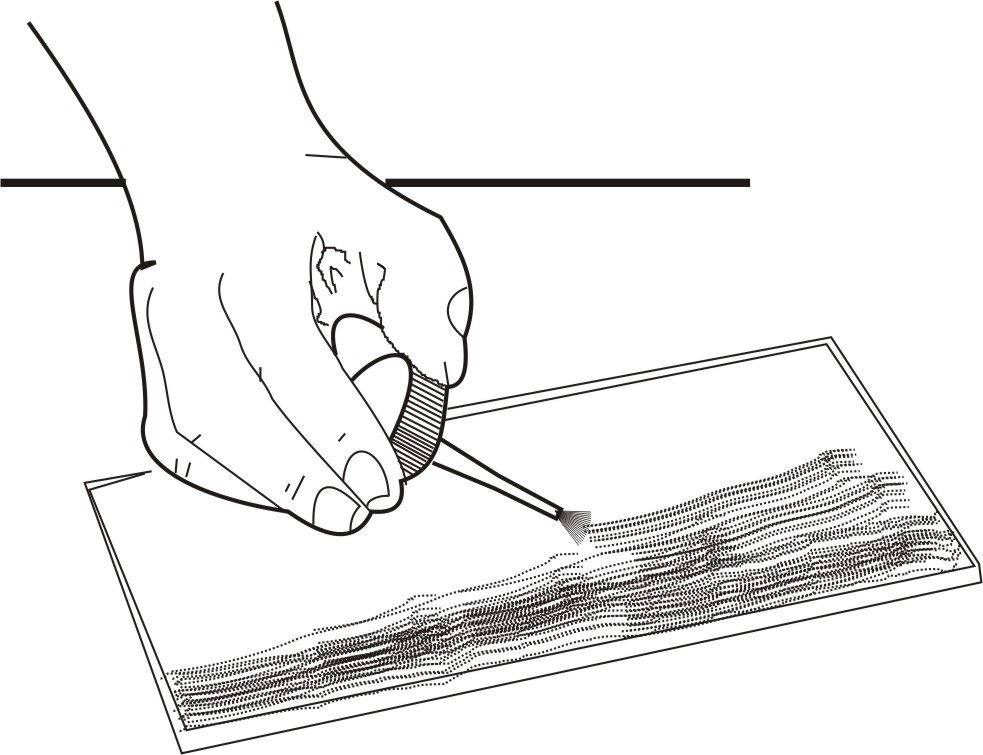
Figure 1: Coating the workpiece with layout dye
Layout and measuring devices are precision tools. They are carefully machined, accurately marked and, in many cases, are made up of very delicate parts. When using these tools, be careful not to drop, bend, or scratch them. To get a finished product with high accuracy it is very important to understand how to read, use, and care for these tools.
Tools used to do measuring and layout work include precision steel rules, layout rules, vernier caliper, micrometers, squares, bevel protractors, surface gages, height gages, scribers, hermaphrodite calipers, dividers, prick punches, center punches, V-blocks, adjustable parallels, angle plates, and a variety of clamps, hammers, telescoping gage, small hole gage, feeler gage, pitch gage. These layout tools are described in the following section.
| Tutorial 10 | Tutorial 12 |